> For the complete documentation index, see [llms.txt](https://docs.fwallet.net/llms.txt). Markdown versions of documentation pages are available by appending `.md` to page URLs; this page is available as [Markdown](https://docs.fwallet.net/web-fruits-wallet/staking/how-to-stake/staking-ethereum.md).
# Staking Ethereum
To use the function, including the following steps.
**Step 1**
* In the vertical navigation bar, click “Staking” to access the “Staking” function.
**Step 2**
The user provides some of the following information
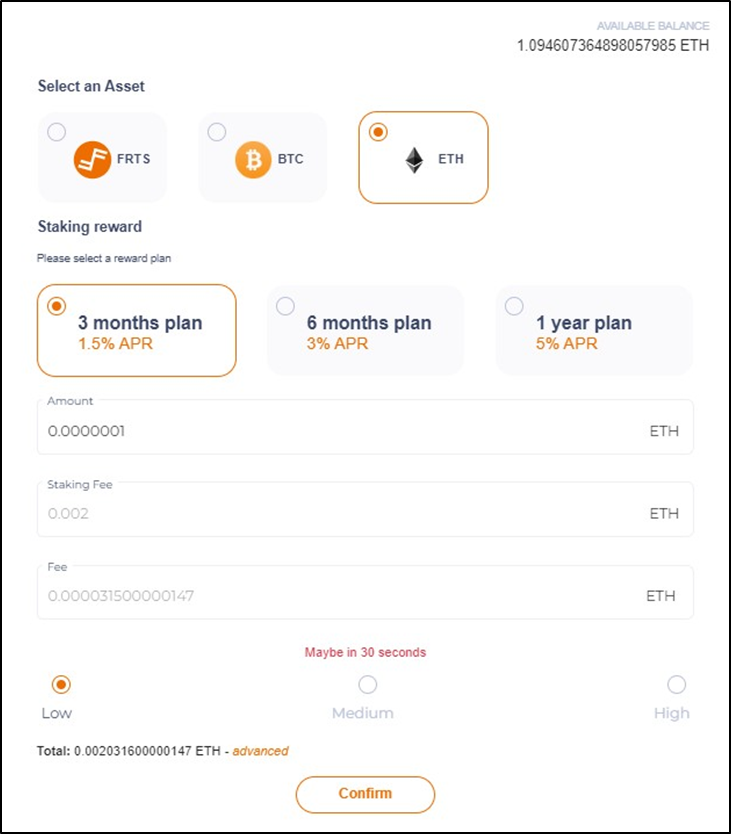
* Select an asset to apply to stake: choose ETH
* Select a reward plan, including 3 packages:
* 3 months plan, 1.5% APR (default)
* 6 months plan, 3% APR
* 1 year plan, 5% APR
* Enter the amount you want to stake.
* Select the fee to pay for the transaction, including Low, Medium, and High (the higher the fee, the faster the transaction processing time).
* See some information about the transaction (gas limit, max priority, max gas fee) by clicking "Advanced“.
**Step 3**
* The system checks the input value.
* If it is valid (assets must be sufficient for staking, transaction fees, and staking fees), the “Confirm” button is enabled.
* Click on the “Confirm” button 🡪 Redirect to the “Staking Donation” screen.
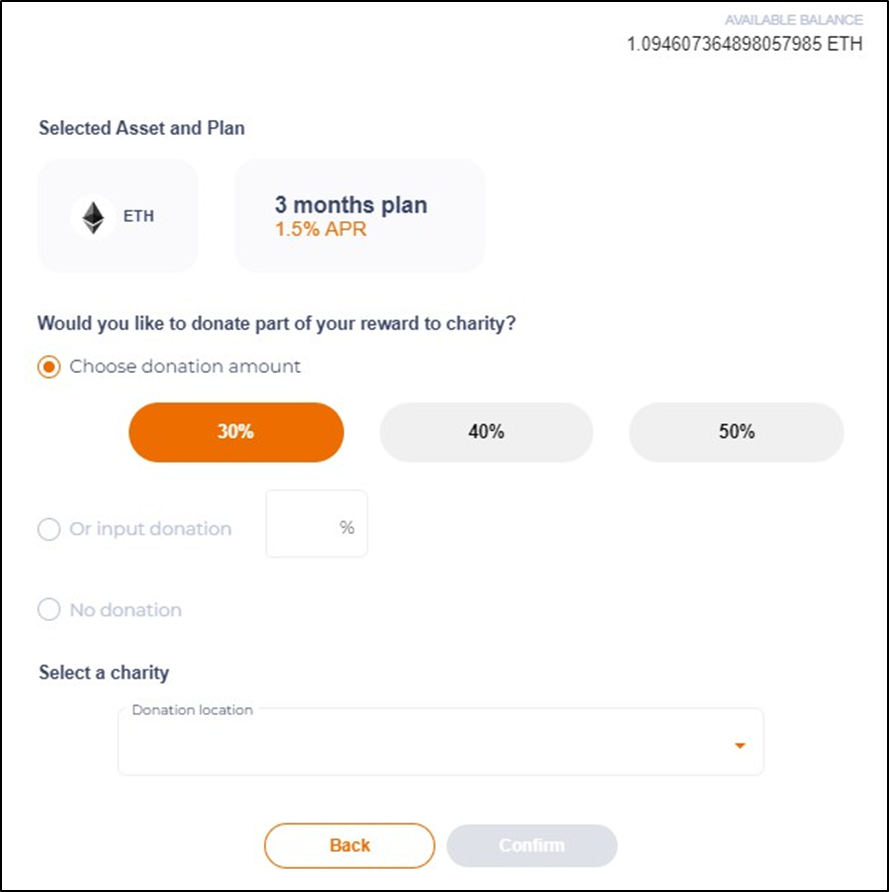
At the Staking Donation screen, users will donate part of the interest received after the reward staking has been completed.
**Step 4**
Select donation plan
* Choose donation amount: 30%, 40% or 50%.
* Or enter the specific value you want to donate.
* Or no donation.
**Step 5**
Select a charity that you would like to donate to:
* Any Charity (the FRUITS organization will make a donation to any region).
* Or select a region where the FRUITS organization is calling for donations.
**Step 6**
* The system checks the input value.
* If it is valid (must select the donate plan), the ‘Confirm’ button is enabled.
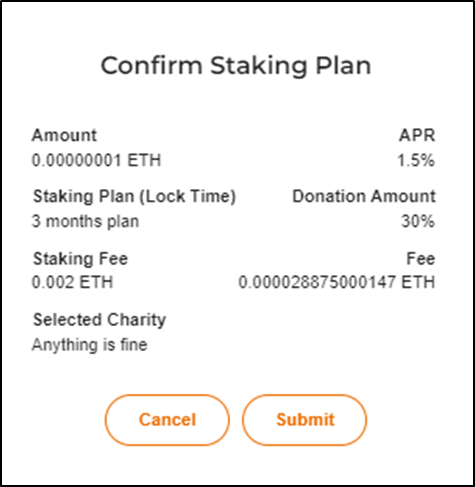
* Click on the “Confirm” button 🡪 Display the “Confirm Plan Staking” popup.
At the Confirm Plan Staking, display the following information:
* Amount: the amount of staked user coins.
* APR: the interest that users receive after the "staking" is completed.
* Staking Plan (Lock Time): Staking plan that the user has registered for staking.
* Donation Amount: Donation level after reward staking is completed.
* Staking Fee: Fee for Staking.
* Selected Charity: A donation amount will be sent to a region.
**Step 7**
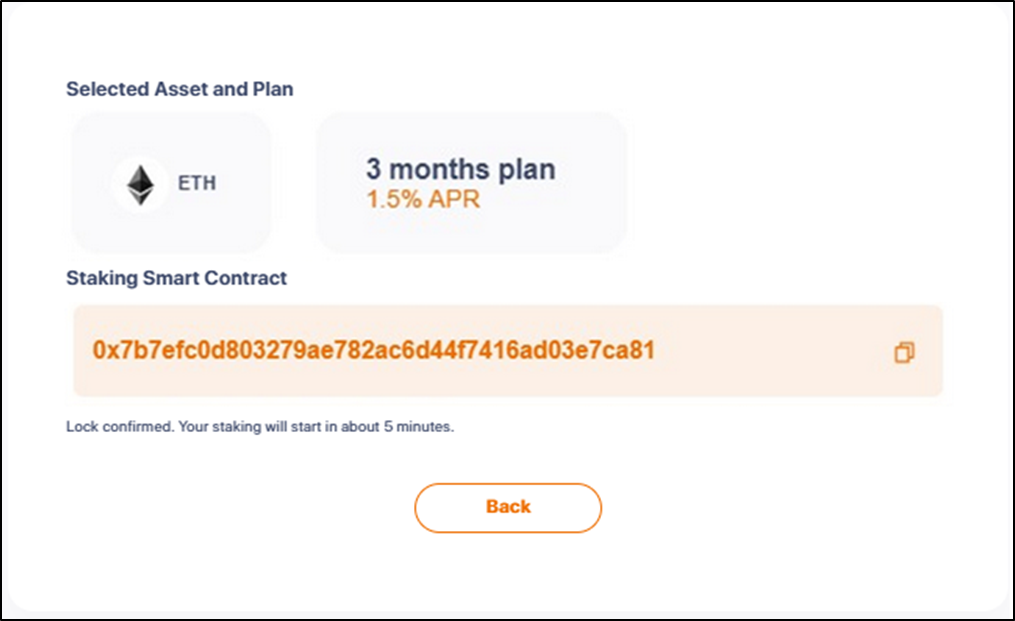
* Click on the “Submit” button 🡪 Redirect to the Information Staking screen that the user has selected to apply.